Well, it’s hard to believe it, but school has been in session for almost a month now, and fall is right around the corner. And while I’m not ready to pull out my pumpkins just yet, I am looking forward to cooler weather. You know, the kind of weather that constitutes wearing a sweater outside of the home, not just inside. Yes, I wear sweaters inside since my internal temperature seems to be the exact opposite of my husband’s. I am usually cold. That means blankets are a must year round, which makes me desperate for my next project–a blanket ladder. I have researched and researched what feels like a multitude of these online, and not because it is a difficult project, but rather there are just so. many. to. choose. from. I mean, seriously you have the chunky, tall ladders, the thin tall ladders, the in-between, the slanted ladders, half-height ladders, and all in every stain or paint imaginable. I had a lot of soul searching to do before I dedicated myself to one ladder. Of course, as with all of my projects so far, I chose one similar to my liking and then made it my own. In this case, I wanted something not too chunky, but sturdy enough to hold an actual blanket. We like blankets that a whole family can sit under ’round here, and those need a nice, sturdy base. Also, the room I planned on putting this beauty needed a little more stain. Our couch is dark brown, but the walls are very light neutral, as is our media console and end tables. The other pieces in this room are a weathered look, so I needed another bold color. I decided to stain it the same shade as my farmhouse dining room table I made in this post. Sooo, without further ado, let’s get started! In this post, I will walk you through the simple steps it takes to make a DIY blanket ladder. Bonus** it costs less than 20 dollars AND you can make it in a weekend (or sooner).
Materials:
2 2x4s at 8′
4 1x3s cut at 18″ for the rungs (you could buy 1 at 6′, or use scraps from previous projects!)
Wood Glue
Rustoleum Stain in Dark Walnut on Amazon here
Rustoleum Triple Thick Polyurethane on Amazon here
2″ pocket hole screws by Kreg on Amazon here
Tools:
Power Drill (to drill the screws in for the rungs)
Miter Saw (to cut the angles on the ladder sides and cut the rungs)
Kreg Jig (to create pocket holes for the rungs). You can get yours from Amazon here
Sander or sand paper (to sand the rungs smooth–we don’t want those amazing blankets to catch!)
Straight Edge (trust me, you NEED this!)
Instructions:
Start by cutting the ladder sides to match–I cut mine at 7 feet. I wanted mine parallel, but angled at the ground AND wall. So, I set one up at the angle I liked, drew a line parallel to the ground (yes, that’s a sanding block), and cut appropriately *for each 2×4. It ended up being a 10 degree angle, which I cut with my mitre saw.

Then, cut the rungs at the desired length. As noted above, mine are 18″. Drill 2 pocket holes at each end with the Kreg Jig. Make sure it is set for 3/4″ of wood.

Use wood glue to attach the rungs to the ladder sides (read the caption for warning! Angles can be tricky and glue is hard to undo!)
Using 2 inch pocket hole screws, screw the rungs in to the ladder sides. You should need 16 screws for this ladder. I put the top rung about 6 inches from the top, and the bottom about 1.5 feet from the bottom. That left me with about 1.5 feet between each rung. Measure and divide by 3 to be exact.

Sand and wipe clean and dry. Stain and apply a coat of Rustoleum’s Triple Thick Polyurethane in gloss (my favorite!)

Let dry. I waited about 24 hours before I hung anything on it.
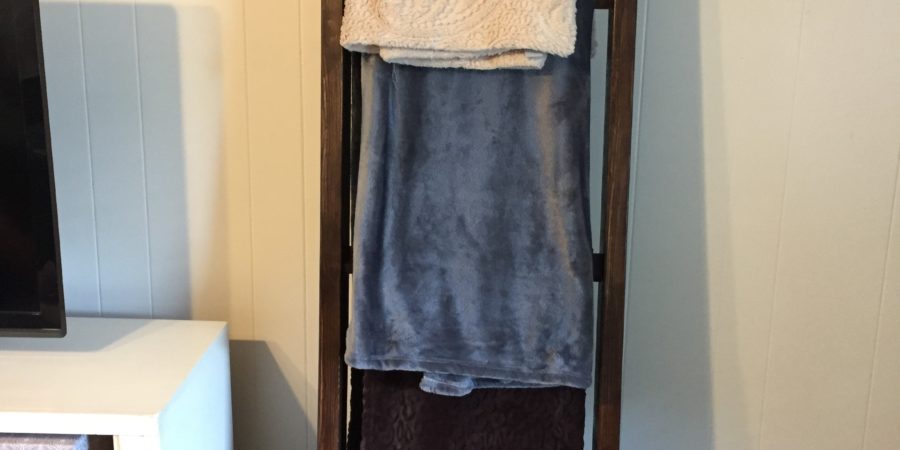
Hang blankets! Here she is ready for those blankets.

Here she is all dressed up!

Total cost: I had the stain, poly, screws, and 1×3, so all I had to buy were the 2x4s, which cost me about $7.50!
Time: The build itself took me about an hour and another hour to stain/poly with dry time in between. This could be done in less than a day!
Happy building!
This post contains affiliate links. If you purchase a product from this post, I may be compensated, but this will occur at no additional charge to you!
