Disclaimer: This post contains affiliate ads. I may be compensated for any purchases made. This is at no additional cost to you! Thank you for supporting SLPW!


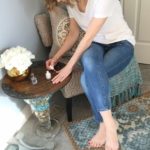

I don’t know about you, but I LOOOOVE me a good manicure. If I could afford it, I would probably get a manicure every other week (at least!). Buuuut, me being financially responsible means no bi weekly manis *sniff. BUT I have a solution with an at-home manicure that allows me to get a professional manicure once a month (who am I kidding? It’s more like once a season) and fill in the rest with my own abilities. I will say at first that I have been giving myself manicures for quite some time now, so my hand is steady-trained (that’s a thing!). If you aren’t as confident in your technique, I would recommend starting with a light colored polish or even clear. I will also disclaim that I am not a professional manicurist, I have just been watching and learning over the years. Below are the few steps that I have found are best for at-home manicures (and they’re not as hard as you think!). Note: Before you begin, make sure your workspace is protected!

Step 1: Remove old nail polish
This can sometimes be easier said than done. I always use non-acetone remover. Not sure why, I just do. I’m sure there is a good reason. If you have glitter nail polish on, and you are having a difficult time taking it off, I recommend the foil method. Take 1/2 a cotton ball dipped in nail polish remover, put it on your nail, and wrap your finger in a small strip of foil. Leave on for a couple minutes then remove and wipe away the rest of the polish. It’s crazy how well this works!

Step 2: Apply cuticle oil and soak nails


This is a two-part step. The cuticle oil softens your cuticles, allowing you to remove them easily. Soaking them helps soften the skin. Apply the cuticle oil and soak both hands at the same time for about 3-5 minutes in warm water.
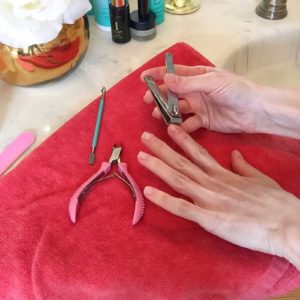
Step 3: Push back cuticles and remove any overhang


This is the most difficult step and the one that needs the most caution. I use a cuticle pusher to push back any overgrown cuticle, and then I use cuticle clippers to cut off any cuticle that overhangs. NOTE: I do NOT cut any cuticle that is still attached to my nail bed. This can cause infection, and that is not good. You can certainly skip this step and still get a really good end result. I have also used a nail trimmer instead of the cuticle clipper, but I prefer the trimmers.
These cuticle nippers are very similar to what I use

Step 4: Cut, File, and Sand nails
This step is entirely up to your personal preference, but it is SOOO necessary for a great finish. Some like their nails long and rounded, while others prefer them short and square. I tend to keep mine short since I work with my hands a lot! I cut them with a large nail clipper (OK, I think they’re actually toe nail clippers) but they give me a good, straight cut. I then round the edges with a nail file. If you aren’t sure how to cut your nails to your liking, watch the professionals the next time you are in. Notice their tools and method. This will help. A Lot. Make sure to file any nail that is hanging off. I do this by filing up and back once I get them to the shape I like. If your nails are yellowed from old polish or are rough for any reason, I highly recommend buffing them.
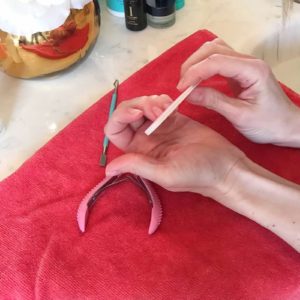
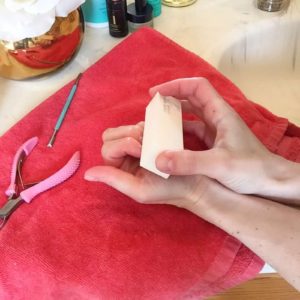
These tools from Sally Beauty are great options for this step! Click on the picture to purchase.


Step 5: Apply the nail polish
This can be the trickiest part. Nail polish, like many things, needs a good base to achieve a flawless finish. In order to get that, it’s important to get a good amount of polish on the brush, but not so much that it drips into your nail bed (or on your carpet. EEK!) Start with one side stroke, then the other side, finishing with a stroke down the middle (connecting the two sides). Before it dries completely, add a second coat of polish the same way. Note: When using your non-dominant hand, it’s best to set your wrist on a steady surface. Then use your wrist (not your arm) to move the brush. Only stroke downward, NOT back and forth!

I love Essie nail enamel. They have 60 different beautiful shades to choose from, and are free from DBP, Toluene, and Formaldehyde! I’m all about safer beauty!
Step 6: Apply the top coat
I always use a gel finish top coat that gives the polish a nice, thick, gel-like finish. This is really the icing on the cake. To best protect the polish from chipping, bring the polish under the tip of the nail to seal it in. Then wait a sufficient amount of time before you use your hands. No one likes a smudged manicure–especially after all of that hard work!

Essie’s Gel Top Coat is my absolute favorite. Goes on smooth and dries quickly!

Did I miss anything? Any tips or tricks you know for a good at-home mani? I’d love to hear!
Don’t forget that giving yourself a good at-home manicure takes time, patience, and practice. Hopefully this helps you extend the time in between professional manicures and save you a couple bucks in the process!
Like this post? Perhaps you would like these as well.
8 Simple Hairstyles for Short Hair

[wpforms id=”394″ title=”true” description=”true”]