Disclaimer: This post may contain affiliate links. This means that if you make a purchase from these links, I may be compensated for it. This is at no additional cost to you! I only promote products that I know and love. Thank you for supporting SLPW.
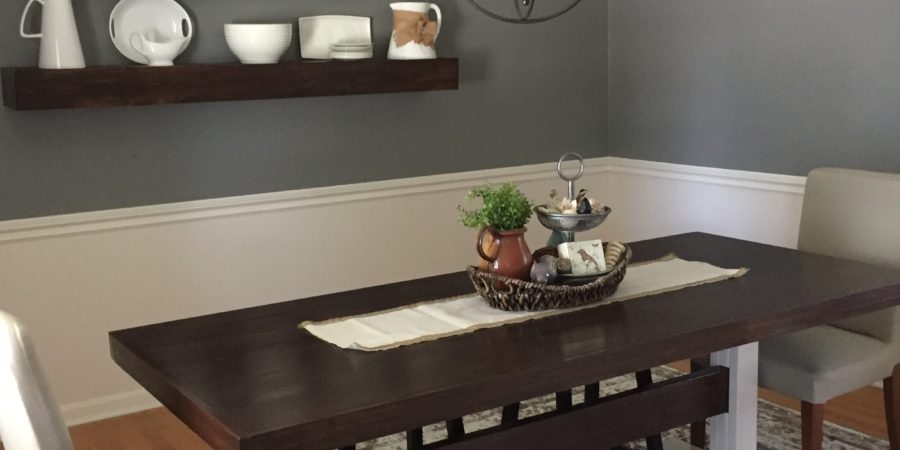
If you were to look at my home from the outside, you would think 1960s suburban house-NOT 1900s farmhouse because, well, that’s what it is. I have seen some GORGEOUS farmhouses. And while I’ve never dreamed myself of LIVING in a farmhouse, there are certain traits of a farmhouse that I absolutely LOVE. I think it’s pretty safe to say I am not alone. In fact, I would go so far as to say that Farmhouse is a style in itself. I’ve never been able to pinpoint my “style” per se, but I keep coming back to the same elements: chippy/painted or raw wood, galvanized metal, fresh flowers, worn in (not worn out) comfort, white, white, a little bit of blue and grey, and more white. I have spent the last 4 years of living in our home trying to bring those elements in. Some times it has been easy, other times more of a feat. In my first post here, I talked about waiting to redo the dining room until very last. Until this past summer, I hadn’t touched it other than putting those “leftover” pieces in that space. I sold my dining table in a yard sale about a month ago and was able to clear the space to envision my dream–a farmhouse table. Now I got really lucky, y’all! My in-laws brought home some wood from their farm and offered it to me (I don’t know what I did to deserve them), and I jumped at the chance to use it for a table top. It was beautiful wood. They took it in to get glued and planed for me, so I didn’t have to do that part. This saved me a lot of time and money. I did, however, have to build the base, and that was a whole other ordeal in itself! There are so. many. choices. I usually default to Shanty2Chic or Ana White, but that didn’t help narrow my options because they have some incredible farmhouse table plans. So I finally chose one that didn’t look too difficult, wasn’t too chunky, and complimented my somewhat-farmhouse “styled” home. Here are the plans I followed for the base. I made sure to read over the plans from Ana White AND the process from Shanty2Chic. This is very important as it gave me a few tips to ensure success! To modify it, I only built two legs, and I had to adjust the width for my table top, which measured 78″ x 33″. Here are some pictures of my progress!
DIY Farmhouse Table


Here’s a before and after. (Yikes! Sorry about the lighting in the before pic!). But what a difference!!

My mom said I could host Thanksgiving this year if I finish the dining room (that was my plan all along. Muah-ah-ah.) So I plan on building a bench with the same look as the table for one side. For the other, I will be searching for three chairs, preferably matching, that I can paint to match the base. For now, I am enjoying the ability to use the space, and the desire to actually WANT to use this space! For years, I would avoid even walking in here. But now, I find myself torn between walking this way to the stairs or the other way for a peek at my gorgeous farmhouse door (for another post!). Other times, I just walk in and sit down in the simple silence as long as I can get it.
Stay tuned for Dining Room Redo Part 3 (and hopefully the last!)…
