Little known fact about me. I love decor, but I greatly dislike paying for it. It’s so expensive!! I also have a hard time committing to one thing on the walls. I change my mind. A LOT. So when I painted our playroom this summer, I didn’t return anything except the clock to the walls. Now this is a big room. It’s basically two rooms wide. It needs a lot of love for the walls. But let’s go back to that fact about not wanting to commit. I have been racking my brain about what to do. Then I remembered this beautiful piece of artwork Eve came home with from school. It is a splatter paint on a purple piece of construction paper. It is beautiful and would be a great addition to this playroom. But how do I display it? Frame it? It’s not a typical size and I would have to do others for a gallery wall, which would be a commitment AND expensive. Another little fact about me I LOVE decor with a purpose. I did some research looking at other playrooms, but even to purchase art displays was not something I wanted to do if I wasn’t 100% certain I would love it. Then came this: a beautiful 1×6 cherry board from my in laws. It was beautiful AND I knew it’s story. Bonus! It needed a little love, but I knew JUST what to do with it. Here’s the best part. The wood was free, and with a few other materials, I made a great display that I LOVE for about $8 in less than 1.5 hours!! What?!? Here are the instructions for this super SIMPLE build:
Materials:
1×6 (x8′) board of any type (mine was cherry, so I didn’t have to stain it)
(4) picture screw eyes with picture wire-2 per display
(4) picture hangers-2 per display
picture nails to hang displays
12 mini clothespins-6 per display (I went a little too small. They work fine for this art, but wouldn’t be good for anything heavier than paper.)
clear finishing gloss OR stain

Instructions:
-
Cut the wood to desired length. I cut mine into (2) 35″ pieces.
-
Spray 2 clear coats if you do not wish to alter the look. Otherwise, stain or paint the pieces. Let dry.

Here is the cherry board before (top) and after (bottom) the gloss. No stain needed! -
Attach the screw eyes. It may be a good idea to pre-drill a tiny hole before screwing them in. I did not and broke two pieces. I almost had to go back to the store and that’s the WORST! I used a measuring tape to make sure both eyes were symmetrical.

This screw eye was a bit flimsy. I would choose one with a bit more integrity next time. Quality over savings sometimes! 
I measured two inches down and one width of the measuring tape in to make sure all the screw eyes were in the same place. -
Wrap picture wire around one eye, pull through and pull taught. You don’t need any wire lag that hangs down. Then thread it through the other eye and twist to secure.

-
Turn piece around to the back and nail two picture hangers on the back. The longer your board, the more you may need for this. See picture below for the sawtooth hangers I used.


-
Add mini clothespins for attaching art.
-
Hang and add art!

-
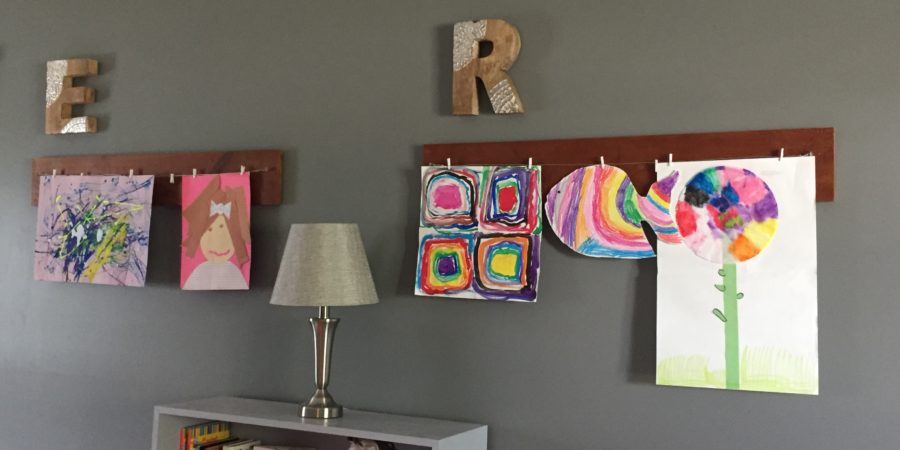
*Optional* Hang an identifier above the art display like an initial or portrait. I found these letters for $8 each at TJ Maxx.
There you have it. So cute and you can change the art with the seasons. I am so happy with how this turned out. I’d love to see your SIMPLE art display builds, so please share!!
That’s a great idea, love the initials above each one of them. Keep the ideas coming. What’s your ideas for a pantry?
Thank you! I will add pantry ideas to my list of blog post ideas! I actually need help in that area myself since our home doesn’t have a designated area for food, so we just use our cabinet space. I am definitely looking for ideas to help in that area, and I will let you know when I do! Thanks for the idea! Whatever it is, I’m sure it will include a LOT of (possibly hand made) organizational tools!
I love this! It would be awesome for displaying Christmas cards too, especially the photo ones….need to make a Hobby Lobby run!!
I didn’t think about the cards! That is a great idea!!