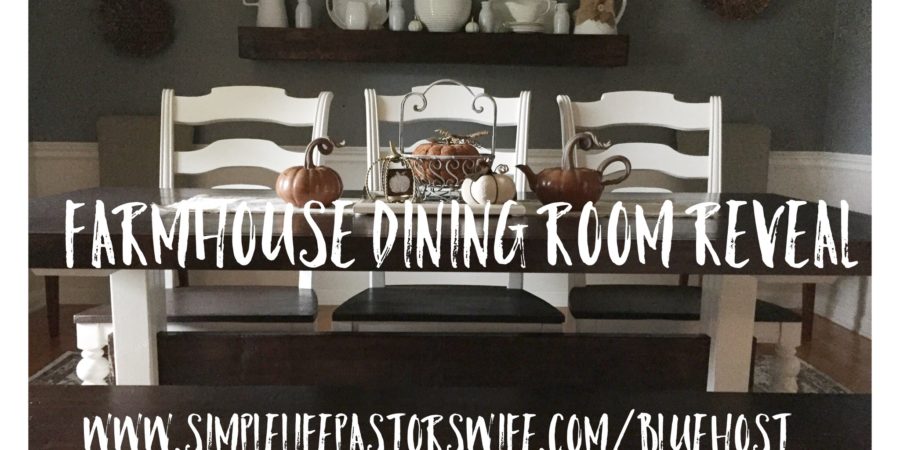
Pinch me, I MUST be dreaming! I cannot believe I am FINALLY revealing our farmhouse style dining room to you today. We moved into this house over 4 years ago, and our dining room was under appreciated and underutilized, to say the least. The worst part? It is one of the first rooms you see when you enter our front door. Needless to say, it was not easy to hide. We did our best keeping the lights off and eating around the kitchen table, as cramped as it was. So sad. That room was drab, the furniture from our other home did NOT work in the space, and I was downright embarrassed of the way it looked. There was even a space on the wall where the paint chipped off only to reveal floral wallpaper underneath. NOT the reveal I was hoping for. No, I did not pull all that wallpaper down. That would’ve been a nightmare! Been there. Done that. I did NOT buy the t-shirt NOR look back! I did, however, freshen this room up with a coat of paint. That’s really all it needed–the wall that is. The rest of the room, weeeell…it needed almost a complete update. For the most part, the bones were good-beautiful wood floors, crown molding, and chair rail were already installed and I had painted the bottom 1/3 of the wall when we first moved in. So, no, Joanna, no walls were removed during this process. 🙂 Now, and FINALLY I am here to give you the last installment of the update. In this post, I will share with you the simple farmhouse bench plans I used and you can see how I updated and refinished the chairs to match (that were purchased from Facebook for $50!). You can see update 1 here and update 2 here. Then, we can all look back and see what can be accomplished with a little bit of know-how, a few tools, and some time. I hope you love it!
This post contains affiliate links for your convenience. I may be compensated for purchases. This is at no additional cost to you!
Farmhouse Dining Bench
For the last phase of this update, I wanted a bench to match the table, but as you saw in this post, the table plans had to be altered to fit my need and desire. So, I had to do the same alterations to the bench so it would match the table. I used the Triple Pedestal Farmhouse Bench plans that Ana White designed for Shanty 2 Chic. I only used two pedestals, like the table, because it is a 6 foot table, not 9 feet like the original plans call for. I had to estimate how to adjust the measurements, but the plans make it pretty simple to do so. Speaking of simple, if I can build this bench, almost anyone can. She makes it sooo easy! Here are some pics of the building process.

**A tip that was mentioned in Ana White’s plans was to make sure the stretcher fits in the opening of the pedestal BEFORE gluing and nailing down. This is REALLY important!! I made sure the first side fit, but not the second. Whoops! I ended up spending about 15 extra minutes sanding down one end so that it would fit. Not. Fun.


Finish: I painted the pedestals and chairs with Valspar paint, tinted to Cream in My Coffee.
I stained the stretcher, bench top, and chair seats using Rustoleum’s Dark Walnut.
I used Rustoleum Triple Thick Verathane to put a finishing coat on all pieces. This stuff is AMAZING!!
Here are some pics of it all put together:


There you have it! To get the full effect of this reveal, I will once again show you the Before/After pic:

Praise the Lord it is done!! I hope this inspires you to grab ahold of those under appreciated areas in your home too. You can do it!
If you liked this, here are some other posts you might enjoy:
Farmhouse Dining Room Update Part 1
Farmhouse Dining Room Update Part 2
Sources:
Rustoleum Dark Walnut Stain from Amazon found here
Rustoleum Triple Thick Verathane in Semi Gloss from Amazon found here
Paint on Walls: Behr in Letter Gray
Paint on Furniture: Valspar in Cream in My Coffee
Lighting from Amazon found here
Rug from Amazon found here
Curtains from Amazon found here
Wreaths from TJMaxx, but similar ones from Amazon here
Letter from Hobby Lobby found here
I am a participant in the Amazon Services LLC Associates Program, an affiliate advertising program designed to provide a means for sites to earn advertising fees by advertising and linking to amazon.com.
[wpforms id=”394″ title=”true” description=”true”


Who need JoAnna when we have Jenny!
You’re too funny! The answer is I! I need JoAnna! Where else do you think I get a lot of my inspiration? 🙂