
Welcome to another episode of “I couldn’t find it, so I built it”. Just kidding. That’s not a thing. But if it were, I’d definitely be the all about that. Seriously though, how frustrating is it to want something so specific, but find it impossible to, well, find? You scour the shelves, or internet for days, nay, weeks until you FINALLY find what you were looking for (or at least the closest version of it). Then maybe it’s too expensive or not quite the right size, color, material. Enter this simple window box plan.
That’s how this project began. I had just finished painting the front porch of our home [see that post here], when I looked at our sad, lifeless windows, and decided they needed window boxes. Black window boxes. 36″ black window boxes, to be exact, that were weather resistant.
I looked online for a simple window box plan, but I couldn’t find what I was looking for with a price tag I was willing to pay. So I turned to Pinterest (isn’t that where all projects begin?) to look for a simple window box plan. I found a few, but not any that were to my specific desires. Some were suuuuper inexpensive, but they didn’t use a liner, so were extra susceptible to weathering. Some were the perfect build, but not long enough.
Enter, this simple window box plan. I will show you how I built, painted, and protected my 36″ black window box. But even more, I will empower you to custom build your own simple window box. Because seriously, if I can do it, so can you!
DRAW A PLAN
To begin, I drew up a draft of what I wanted my box to look like. I found pictures of the build I liked the most (aka was the simplest design), and measured the windows were they would go. I knew that I wanted a 36″ box with a liner. That meant I needed enough material (wood) to cover the liner, and enough trim to go around that. I also made a happy, but realistic mistake that led me to realize that since I had a liner, my window box didn’t need a back and could sit right against the brick. Then I made a list of materials. I have made an amazon list here for you to check out and maybe save yourself a trip to the store!
MATERIALS FOR ONE 36″ WINDOW BOX (final dimensions: 39″)

(1) 36″ window box liner (I used black plastic, but another option would be fiber liners)
(1) 1x8x8 piece of whitewood board (any wood can be used here. I originally wanted cedar buuuut KACHING! $$)
(1) 1x2x8 piece of whitewood for the top trim
(1) 1x3x8 piece of whitewood for the bottom trim
Weather resistant paint (I had mine tinted black)
Outdoor Urethane
MISC: 1.25″ finishing nails, wood glue, brushes, wood putty, paintable and waterproof caulk, sandpaper or sander
TOOLS: Mitre or Circular Saw, brad nailer (or hammer), measuring tape, square, clamps, drill/bit for drainage holes
MATERIALS NEEDED TO INSTALL
(2) 6.5″ galvanized brackets (I didn’t want mine to show, but I have seen some beautiful boxes with brackets shown underneath)
Masonry anchors and screws to attach to wall (I used 4 per box), 1/2″ screws to attach box to brackets (4 per box), masonry drill bit
WINDOW BOX INSTRUCTIONS:
Measure and cut the main box
Lay the window box liner down on the 1x8x8 lumber with at least 1/2″ clearance on the sides. It’s best to do lay the box upside down since most are tapered, and the top is actually wider than the bottom. Mark and cut 1 piece for the bottom. Mine was 37.5″ long.
Measure the height of the liner, add at least 1/4″ clearance and cut 2 pieces for the sides. Mine was a perfect square, at 7.5″
Put the side pieces against both sides of one of the longer pieces, making sure they are square, and attach with wood glue and clamps. Once dry (about 20 minutes), reinforce with 1.25″ brad nails. *wood glue is really important here. It’s actually a stronger adhesive than the nails, the nails just hold it together until it has cured and at it’s fullest strength.
Measure the front of the box (side to side) and cut your front piece out of the remaining 1x8x8 lumber. Attach it to the front using wood glue, clamps. Reinforce with nails once dry.
Measure and cut the trim
Measure the width of the side and cut 2 pieces of trim from BOTH of the 1x2x8 (top) and the 1x3x8 (bottom) lumber. Use wood glue, clamps, and nails to attach sides. These should be flush with the front AND back of the box.
Measure the front face of the box to cut your top and bottom trim pieces from the remaining 1x2x8 and 1x3x8 lumber. Attach with glue, clamps, and nails.
FINISHING TOUCHES
Fill all holes with putty. Once dry, sand it smooth.
Caulk all seams by placing the tip of the caulk in the seams and dragging at a 45 degree angle. Then run your finger over it to smooth it out and fill the gaps. THIS STEP MAKES A HUGE DIFFERENCE!!
DRILL DRAINAGE HOLES in the liner AND box. I drilled 4 holes using a 1/4″ drill bit in the liner first, then putting it on the bottom board and drilling through both the liner and the box to ensure they would line up when I assembled/attached them. *If I were to do this again, I would drill 1/2″ drainage holes.
Sand down uneven sides/joints and holes to prep for painting.
PAINT
Using a roller or hand brush, paint according to the instructions on the paint can. I painted 2 coats on the outside, and 1 on the inside since I would be using a finishing urethane.
Once dry, brush on urethane according to instructions on can. Mine called for 3 coats…I am impatient and only did 2. 2 years later, and they have held up great. Your call if you’re willing to risk it! Mine are covered by our porch, so they have extra protection. If your box will be exposed to the elements, I’d seriously consider protecting it accurately!!
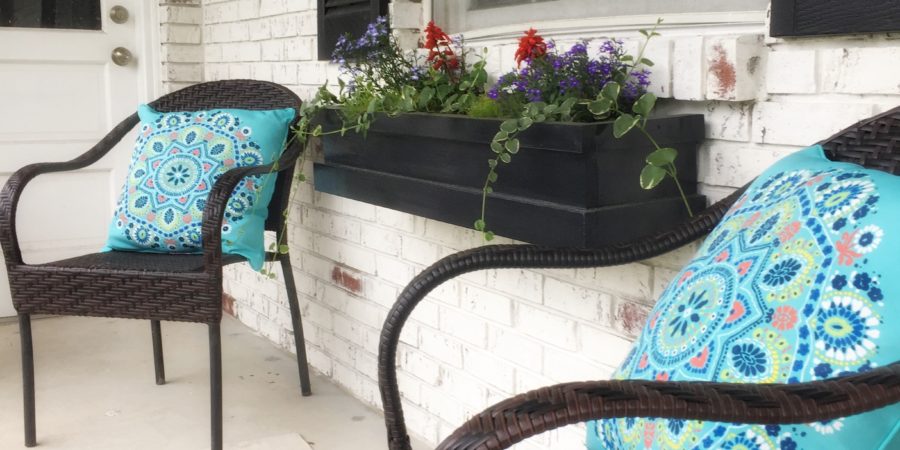
Use the time it takes to dry completely to fill your liner with filler (packing peanuts, pea gravel, or empty water bottles), potting soil, and flowers of your choice. I used Salvia as my “thriller”, Vinca vine and Irish moss as my “spiller” and Lobelia as my “filler”. Sweet potato vine is also a great choice for the “spiller”.
INSTALL
Once the finish has dried, it is ready to be attached to the wall. I used a drill bit according to the package of masonry anchors/screws and placed the brackets low enough so the box would clear the brick beneath the window sill. I wanted them to go into the mortar, so that’s how I determined where the brackets would go. Then I marked the holes, drilled the holes with the masonry bit, added the anchors, and screwed the brackets into the anchors.
Place the liner of flowers into the box, then set the box on top of the brackets, making sure it is evenly spaced between the windows, and attach to the brackets using 1/2″ wood screws. I used 2 for each bracket. The longer your box is, the more brackets you will need for support.
There you have it! Don’t forget to water those beauties! When the spring/summer seasons are over, you can fill your box with mums for the fall, and greenery or giant ribbon and ornaments for the winter. I have even seen people fill their boxes with faux greens and floral and still looks great. The options are endless. I hope you feel confident to build your own Simple Window Box!
